Cartoon Cataract Surgery (Video)
This is a cartoon video showing how a cataract surgery is done from start to finish! The first half is all cartoon animation, and in the second half, I show an actual surgery using the same steps.
Screenshots from this lecture:
Introduction
Cataract surgery is the main operation of the ophthalmologist. There are MANY individual steps during this surgery, however, and this can be overwhelming at first. To help you understand the technique, I’ve created an animated step-by-step video of a cataract surgery from start to finish. The first half of the lecture involves a cartoon animation of a cataract surgery. The last half shows an actual live surgery. I’ve kept the orientation the same between the cartoon and the live surgery to make this easier to understand. Hope you find this useful:


Paracentesis:
The first step is to create a paracentesis … a small incision through the clear cornea. This is done with a side-port blade (there are many types). The key here is to create a small incision that is big enough to get your instruments and cannula through, but no so large that it will leak.


Anesthesia:
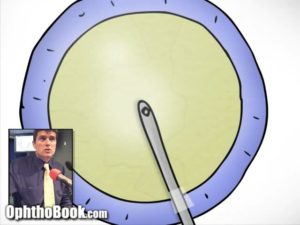
Most of the anesthesia with modern cataract surgery is obtained with topical lidocaine drops (or jelly). However, the inside of the eye can be sensitive as well, particularly the iris muscle itself. Intracameral (in the eye) lidocaine is injected into the anterior chamber to anesthetize the iris and decrease pain during manipulation.

Viscoelastic Protection:
Viscoelastic is then injected into the anterior chamber. This gel protects the inner surface of the cornea and keeps the eye from deflating when we make our main incision. There are several types of viscoelastic that can be used, with dispersive and cohesive properties. I typically use VisCoat during this step … the mnemonic I use is “VisCoat Coats the Cornea” … which is exactly what I want at this stage in order to protect that delicate corneal
window.


Main Incision:
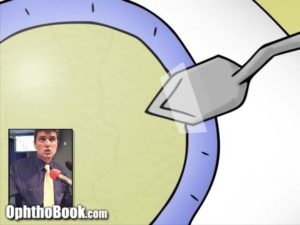
The main incision is made with a keratome through the clear cornea. I perform my surgeries temporally, so I come in from the ear and point my instrument toward the middle of the pupil. You are supposed to make a “tri-planner” incision with this instrument … the idea here being that a stepped incision will be more watertight and less prone to leak. To do this, you angle the blade-tip upwards when contacting the corneal surface, angle it downward as you pass through the stroma, then level out as you enter the anterior chamber. Does this really work? Hard to tell, but certainly good practice to enter in this fashion.

Capsulorhexis:
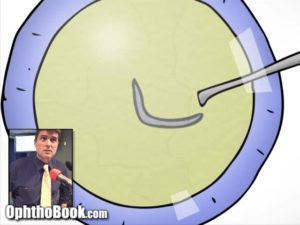
The capsulorhexis is created starting with a cystitome … essentially a bent noodle that “rips a hole” through the anterior capsule. Remember, the cataract has three layers (like a peanut M&M candy). We are trying to make a round hole through the anterior capsule (the front of the “hard candy shell”) so that we can access the inner two layers of the cataract
for subsequent removal. Its easy to start this hole with the cystitome needle, but some people just use their utrata forceps to start this rip.

Rhexis Creation:
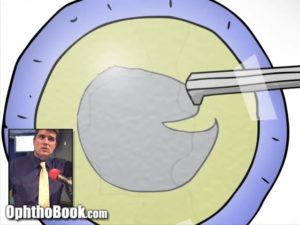
The capsule rent is then extended using Utrata forceps. You have to be very careful as you create this round hole, and peel the thin capsule in a tangential manner. If you aren’t careful, the rip may “run out” into the peripheral lens can cause major problems. The rip might even extend around the back of the cataract during surgery and cause complications with dropped nuclear fragments (and difficulty with placement of the implant). Thus, this is an important step for making the rest of the case go smoothly.
Hydrodissection:
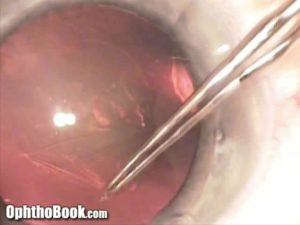
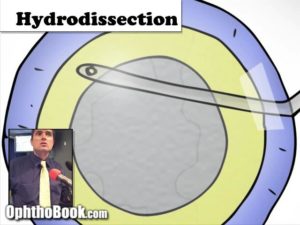
Hydrodissection is performed next. This is when you inject BSS (basic salt solution) fluid between the outer capsule and the middle cortex. This mechanically separates the inner layers of the cataract from the outer capsule, facilitating the removal of the inner cataract. When you perform hydrodissection, angle the cannula immediately under the lip of the capsulorhexis and push your plunger slowly. As the fluid cleaves a plane in the cortex, you will often see a “fluid wave” as the fluid rushes across the back portion of the cataract. This is a good sign. Tap down on the central nucleus occasionally to push the water out and further help with dissection.

Nucleus Rotation:
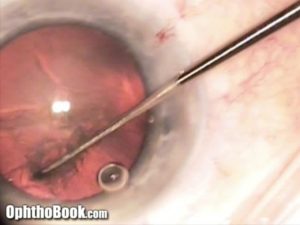
You want to make sure that the inner nucleus layer is truly dissected from the outer capsule at this point. To do this, try spinning the nucleus with an instrument (the blunt-tipped Connor wand is my instrument of choice). Carefully rotate the nucleus … if it spins, you can proceed. If the nucleus won’t spin, then you should probably repeat hydrodissection.

Nucleus Division:
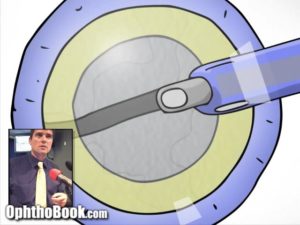
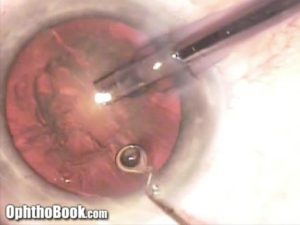
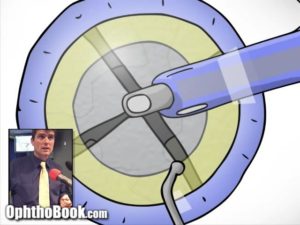
With a clear-cornea surgery like this, you can’t “eat up” the entire central nucleus in one giant piece. Instead, it is better to physically break it into smaller pieces and remove each individual “pie-slice” one at a time. There are many ways to break up the nucleus. Most surgeons begin by using the classic devide-and-conquer technique. This involves splitting the lens into four quadrants, then using phacoemulsification to remove each piece. I show this method with the animated portion of the video. With the live surgery, however, I show a different method called a “horizontal chop” which is faster.
Phacoemulsification:
After dividing up the nuclear fragments, each one is removed with phaco energy. Care is made to run the phaco machine such that the tip of the instrument is roughly level with the iris. If you apply that vibration energy too close to the inner cornea, it can cause damage to the delicate corneal endothelial cells and create corneal swelling (that might not recover). If you run the instrument too deep, you risk breaking through the posterior capsule. These “capsular ruptures” really suck, because pieces of the nucleus can fall through into the back of the retina and cause retinal edema post-operatively. These ruptures also make it hard to place your implant securely at the end.
Fragment Removal:
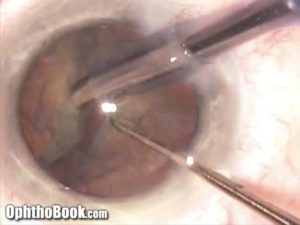
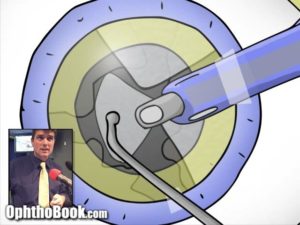
Careful manipulation pushes each of the fragments to the phaco tip. As you remove the nucleus pieces, it becomes more and more important to utilize your second instrument (in this case my trusty Connor wand) to protect the posterior capsule. By keeping your hand deep and under the fragment pieces, you hold the posterior capsule back and keep if from jumping up into your phaco instrument.

Cortex Removal:
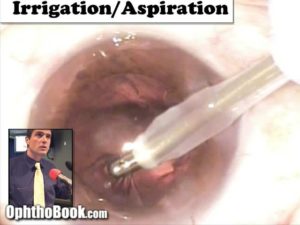
After the inner nucleus is removed, there is still a lot of clear material hanging out inside your capsular bag. This is residual cortical material (the middle layer of the cataract). This cortex is removed with the IA handpiece which vacuums it out. This is done carefully, as you want to peel that cortex off without ripping your supporting capsule bag. The material under your incision site is usually the hardest to get out, because you have to turn your IA instrument over (an awkward rotation of the wrist) and pull that material out without causing damage to your capsule.
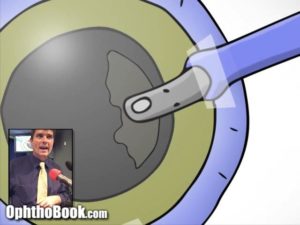
Inflate the capsule “bag”:
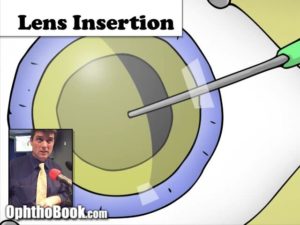
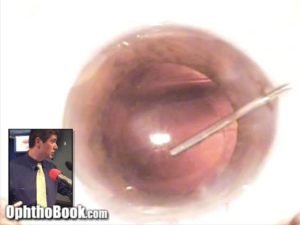
The cataract is out and the implant is ready to go in. However, you can’t just inject that implant forthwith! It is better to reinflate that capsular bag with some more viscoelastic. This will make the implant slide in better, and minimizes the chance of it snagging or causing a rip in the capsule. We use a different viscoelastic at this point … something called ProVisc. This is a cohesive viscoelastic that doesn’t spread or stick too much, making it easier to vacuum out at the end of the case.
Insert the Implant:
Finally, we get to insert the lens implant. The inserter we use is like an injector, but you screw the plunger and it pushes the implant out (there are different kinds of injectors). The implant is folded up inside the clear cartridge (like a folded burrito) and unfolds like a flower into the capsular bag. As you inject, you angle the leading edge of the implant through the capsulorhexis hole, so that it goes inside the capsule.


Position Implant:
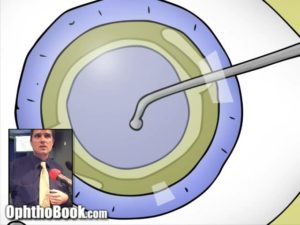
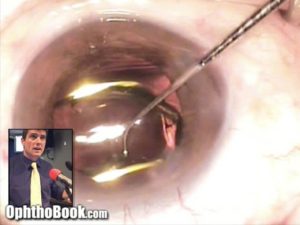
The leading portion of the lens is already in the capsular bag, but you have to push the trailing edge of the implant through the capsulorhexis so that the entire implant unfolds properly. The haptic arms spring out at this point, and secure and help center the central optic. You want the haptic arms to form a backward-S configuration (like this graphic). Otherwise, the implant has been put in upside-down and you have to fix this.
Position Implant:
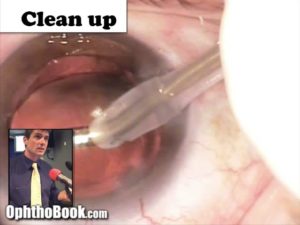
Now that our implant is in good position, you need to clean things up. The irrigation/Aspiration handpiece (the same one used during cortex removal) is used to remove residual viscoelastic. Because we used cohesive ProVisc, the viscoelastic comes out pretty easily. You’ll notice that the implant wobbles quite a bit during this step … this is a good sign. It means that the viscoelastic underneath the lens has rushed around the edge of the implant and into your instrument. We try to get as much of that stuff out as possible, as it can clog the trabecular meshwork and cause problems with pressure spikes the next day.

Hydrate the Incisions:
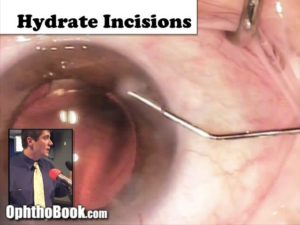
The final step is to secure our incisions. Sure, you could put sutures in them (and sometimes we do) but if you have well constructed incisions … they are small enough that they are practically watertight already. Instead, we hydrate the edges of the incisions with BSS solution and a cannula. This swells the surrounding tissue and keeps it from leaking. I also check the pressure at this point by pushing on the eye with a q-tip to make sure it is reasonably normal.

At the end of the case, we remove the speculum, take the drapes off, apply antibiotic and steroid eye drops, take a clear eye-shield over the eye, and bring the patient to the postoperative area. While there are a lot of steps, with time this surgery will become second nature and the surgery becomes a well-choreographed surgery involving the surgeon, scrub tech, and circulating nurses each doing their part. Fun!
beutiful video
thank you very much
Good work Tim. Welldone! A great video for my nurses.
Clive Novis (ophthalmologist, South Africa).
Excellent for teaching undergraduates
it is agreat educated work thanks alot
Hey – thanks for the site – a great aid in learning and for teaching, even all the way DownUnda in New Zealand.
Cheers
thank you, that was usefull.
fantastic work
Dr.Root you are the best man
thank you very very much for all your videos ,I am realy waiting for more and more from you.
my greetings , and peace upon you.
Hany Bakr from Egypt
good
Optometry student here,
good video, very clear.
Hey , The video was really good. I learnt a lot about Cataract Surgery. It will be really helpful for my exam. Thank you.
Thank you. It’s a great video, simple and easy to understand. Very helpful for the Ophthalmic Nurse course that I am doing. It’s gone even further down under to the great Barossa Valley in South Australia! Cheers!
EXCELLENT WORK!I am MBBS undergad from India n found ur site xtremely informative n interesting.
This a great site. Thank you for all of your hard work simplifying and organizing to makes things so clear. Tom o
Tim
U realy worked hard for this presentation.
really excellent
thanks for the videos
regards
prasad
optometrist
Awesome lecture and video! thanks a ton
Thank you so much for your videos- I have final exams coming up and these are really helpful for revision!
Shyma
(Final year optometry student, London)
UNFORGETTABLE video thank u for making me understand about cataract surgery fastly sir
Brilliant! Thanks. :0)
Easily understandable yet concise and precise lecture!
your videos are an invaluable source for my optometric education!
lots of love!
great document….well done!
clear useful and pratical issue
thanks
I am a brazilian student, and I will be a cataract surgeon! I liked so much this channel, and I send my congratulations from Brazil!
thanks. excellent presentation
I am an ophthalmologist from Sudan …
You are a great teacher and surgeon …
I benefit too much from your book and videos …
Thanks a lot …
Dr. Root,
You are a LIFESAVER, sir!
-from a medical student
u r the best educator i ve ever seen
Thank you very much doctor!
I learned from this short video a lot more than any book i’v read.
My appreciation!
Fantastic work… great uploads for ophthamalogy lovers …
easily understood…thanks
excellent video. thank u so much for sharing this
dear dr.timothy
thanks alot for this illustrative work
its more attractable than the lecs we had in the school
God bless u
Greetings From cairo, Egypt
Go a head forward
Awesome. So appreciate all of your work & sharing it with others. 🙂
good one…as an optometrist,this was very helpful for me.
i easily understood with cataract surgery thank u very much doctor. i want more videos about phaco operation
In CONVENTIONAL extracapsular cataract extraction (i.e., non-phaco), after the anterior lens capsule is removed, does the surgeon remove the nucleus through the capsulorrhexic opening or through the incision made at the limbus? Also, how exactly is the nucleus removed: is it simply expressed out of the eye or removed using a instrument (e.g., a forceps)?
Thank u very much
Dear Dr. Root
Your videos made ophthalmology intresting for me .
Thanks a lot and please keep making more videos
– Prannoy from INDIA
This is an absolutely original idea to teach all the steps involved in Phako/IOl.And it is very good.
Thanks for that.
It gives confidence to patients who see this video before deciding on surgery.
Thank You so much for this wonderful video. I do wish I had you as my professor. You are awesome!
Worth reading and watching!! Your way of representing is very impressive and understandable. This video will help to understand cataract surgery. Thanks for sharing this informative video!!